Sharing with clients
A share turns a folder into a private client gallery — a link your client opens to view, download, and comment on their photos. You keep control of who can open it and what they can do.
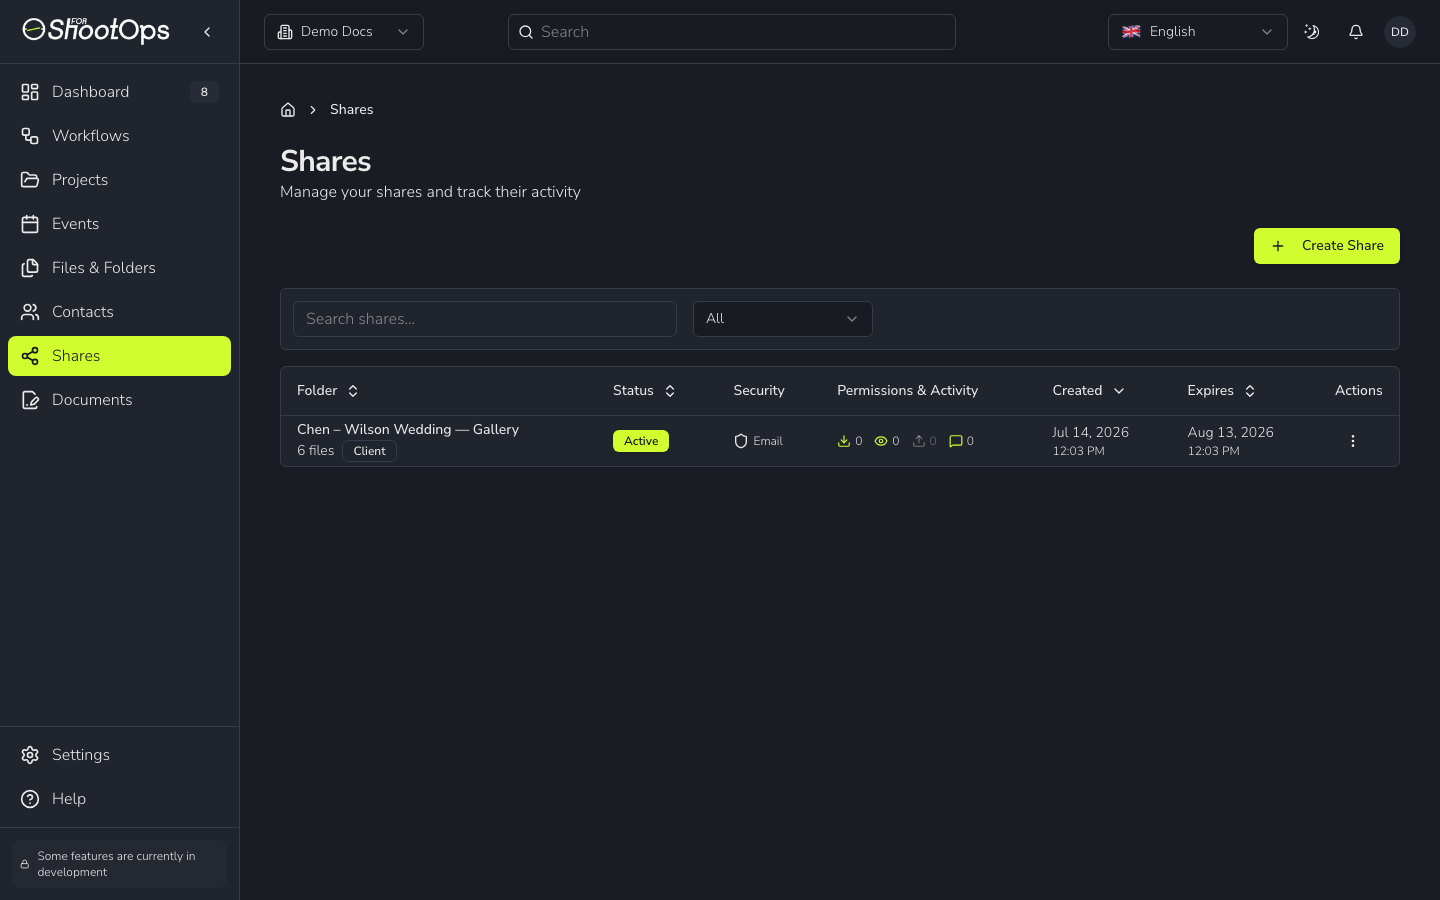
Create a share
From Shares, click Create Share, pick the folder, and choose how it's protected:
Choose the folder
Pick the folder you want the client to see — usually a finished, edited-photos folder.
Set who it's for
A client share is meant for the paying client; a guest share is for a wider audience. Add recipients by email or phone, or pick an existing contact.
Set permissions
Decide whether recipients can download, comment, and see file details. Downloads are on by default for client galleries.
Protect the link
Turn on one-time passcode (OTP) so only people who receive the code by email or SMS can open the gallery. You can also set a password and an expiry date.
Tip
With OTP on, the recipient enters a short code sent to their email or phone before the gallery opens — so a forwarded link alone won't grant access.
Track what happens
Each share row shows live activity — downloads, views, and comments — and when the link expires. 4ShootOps can confirm when a client has actually downloaded their files, so you know a delivery really landed — not just that the link was opened.
You can deactivate a share at any time from its actions menu to revoke access immediately.